Start with as little as today’s value, or let the purchase wizard record the whole purchase. Every way uses the same property, so you can begin small and add the rest later without typing anything twice. Pick a way below to see each step on the real screens (shown with sample data).
Names in bold are the pages, tabs and buttons as the app shows them.
Step-by-step tutorials
Pick a way. The screens are shown with sample data.
- EssentialsOnly what it’s worth today and what you still owe. About one minute.
- FinancingThe purchase and the mortgage, so the app follows your balance and equity month by month.
- ManagementUnits, tenants, leases, rent and expenses for a rental, with the basic numbers.
- EverythingEverything. The purchase wizard records the purchase, the leases, the bills and the documents.
Essentials
For someone who wants the property in their net worth today and nothing else. Only the name is required; the value comes from one valuation.
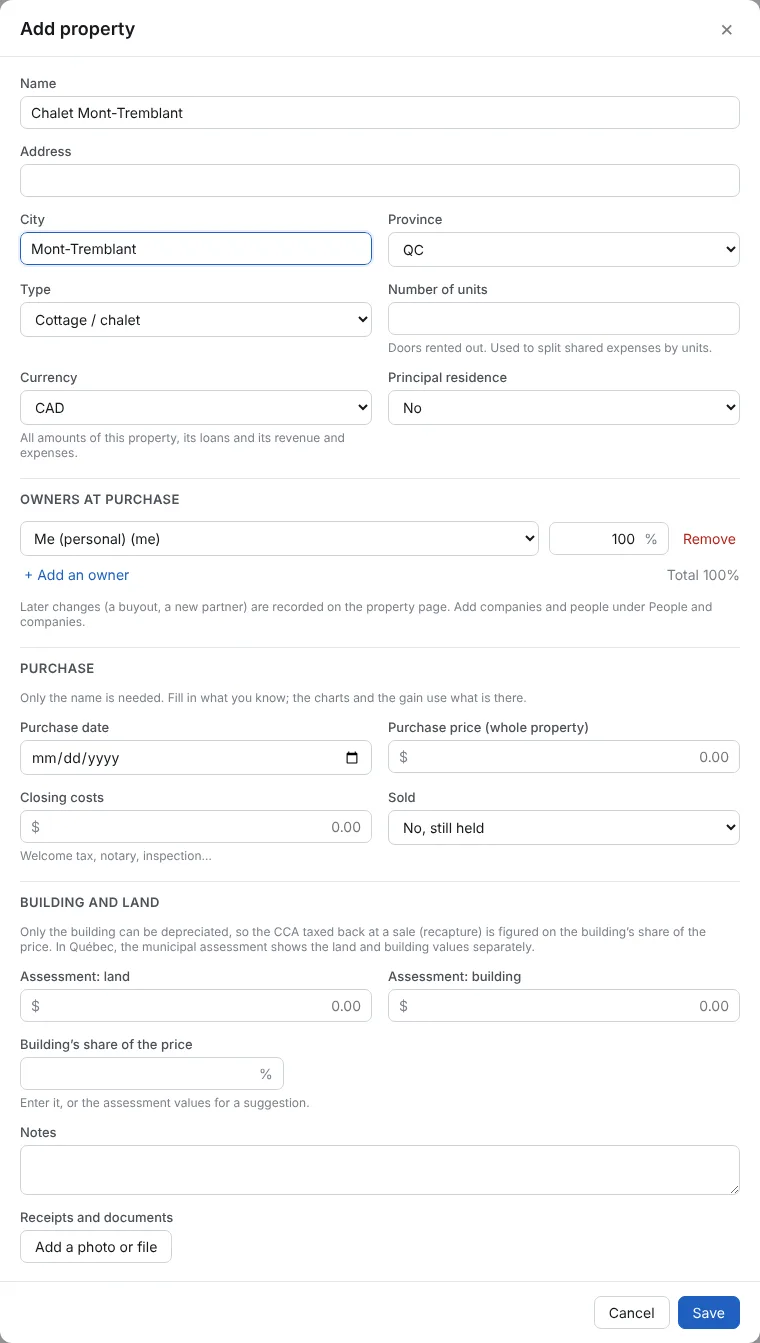
Step 1: Open Real estate and click Add property
Type the Name. City, province and type are optional but help the list. Leave every other field empty and click Save.
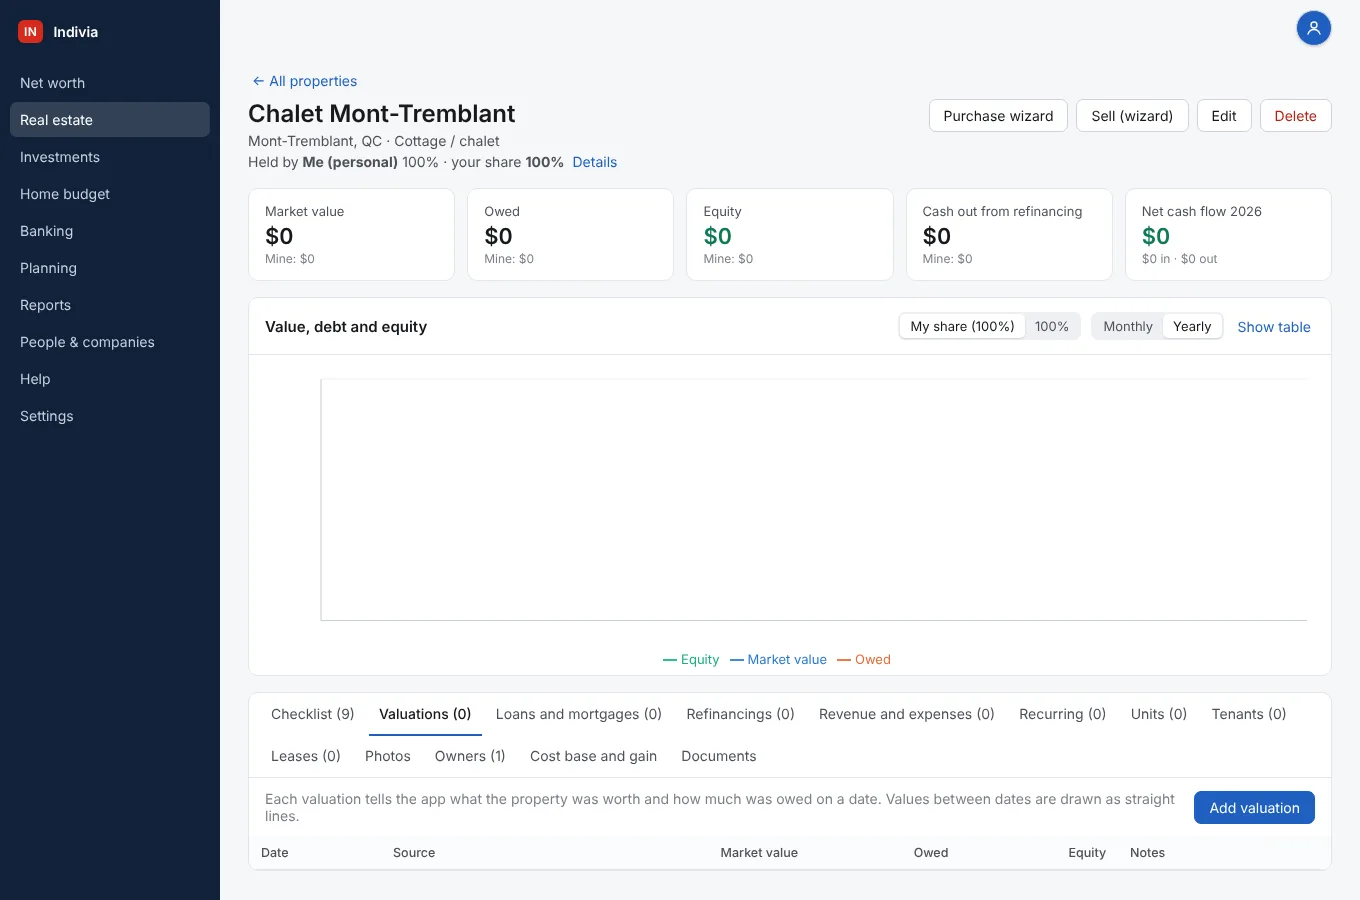
Step 2: The property opens, empty
Everything shows $0 for now. The Valuations tab is already open, with the Add valuation button on the right.
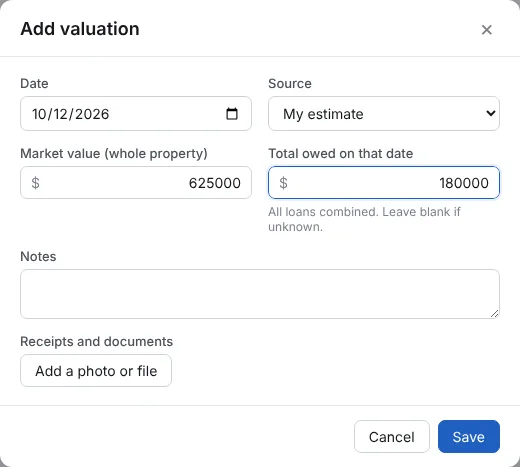
Step 3: Add today’s value
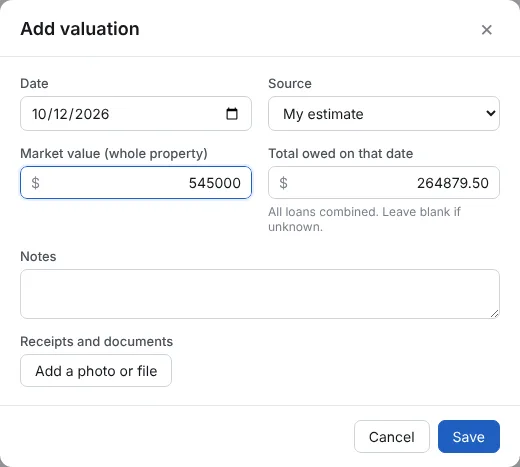
Click Add valuation. The date is today. Type the Market value of the whole property and, if you know it, the Total owed on all loans together. Leave Total owed empty if there is no loan. Click Save.
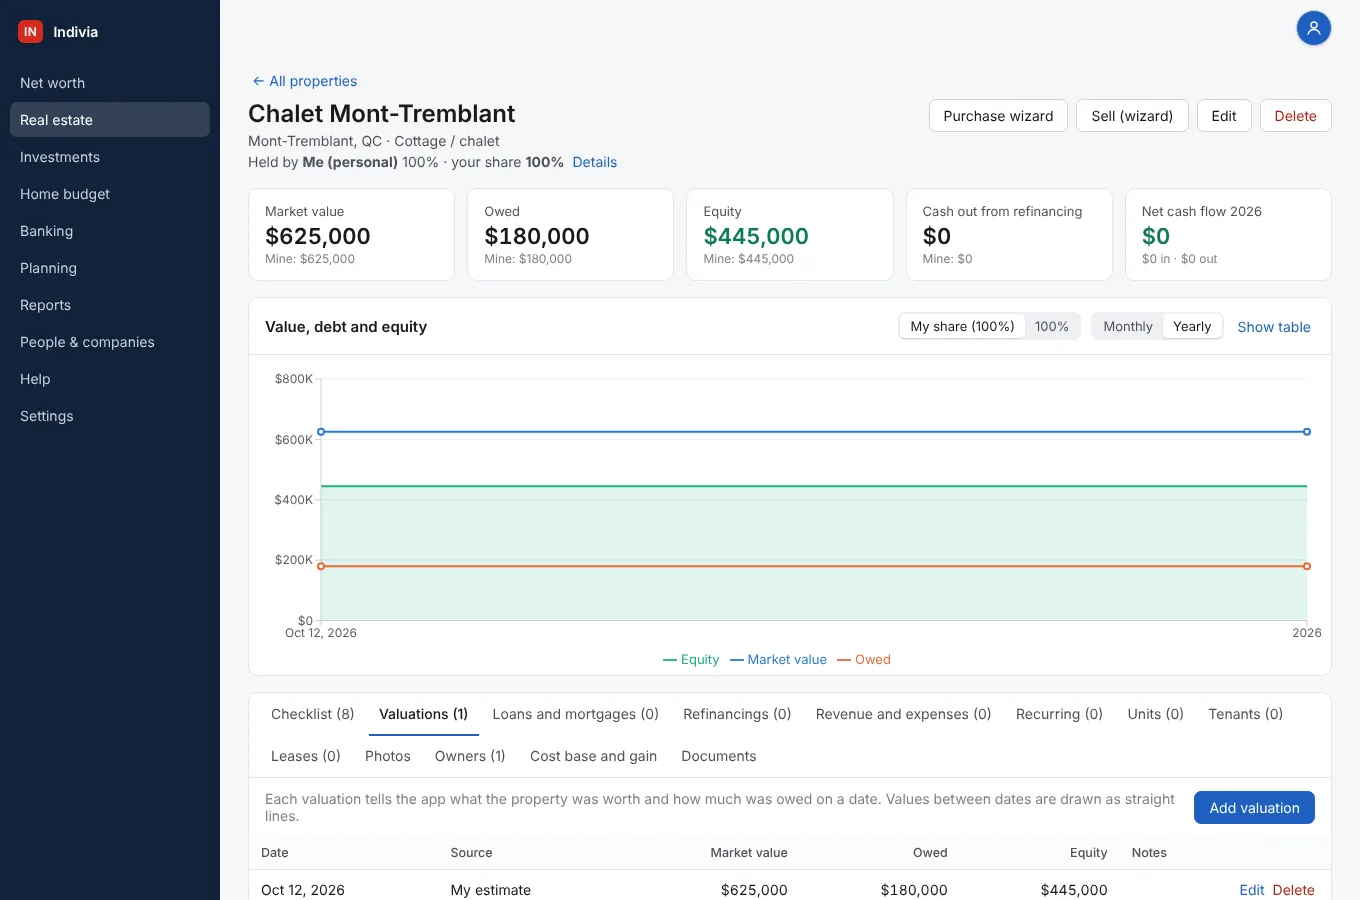
Step 4: Done: value, owed and equity show
The page shows the value, what is owed and your equity. Your net worth includes it right away.
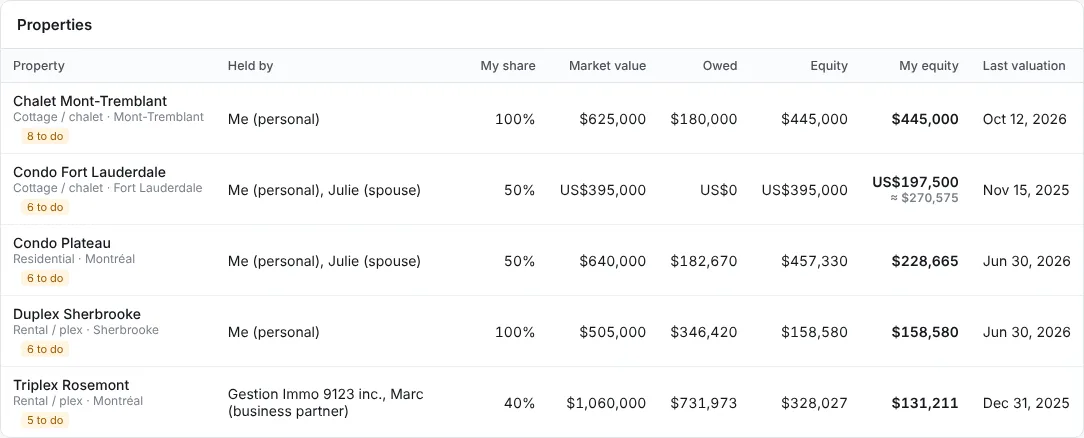
Step 5: It is in your list of properties
The yellow “to do” tag counts the checklist items you skipped. You can ignore it, or mark items Not needed on the Checklist tab.
Financing
For someone who wants the real numbers: what was paid, how the mortgage goes down and the equity built since buying. Have the purchase date and price and the mortgage papers handy.
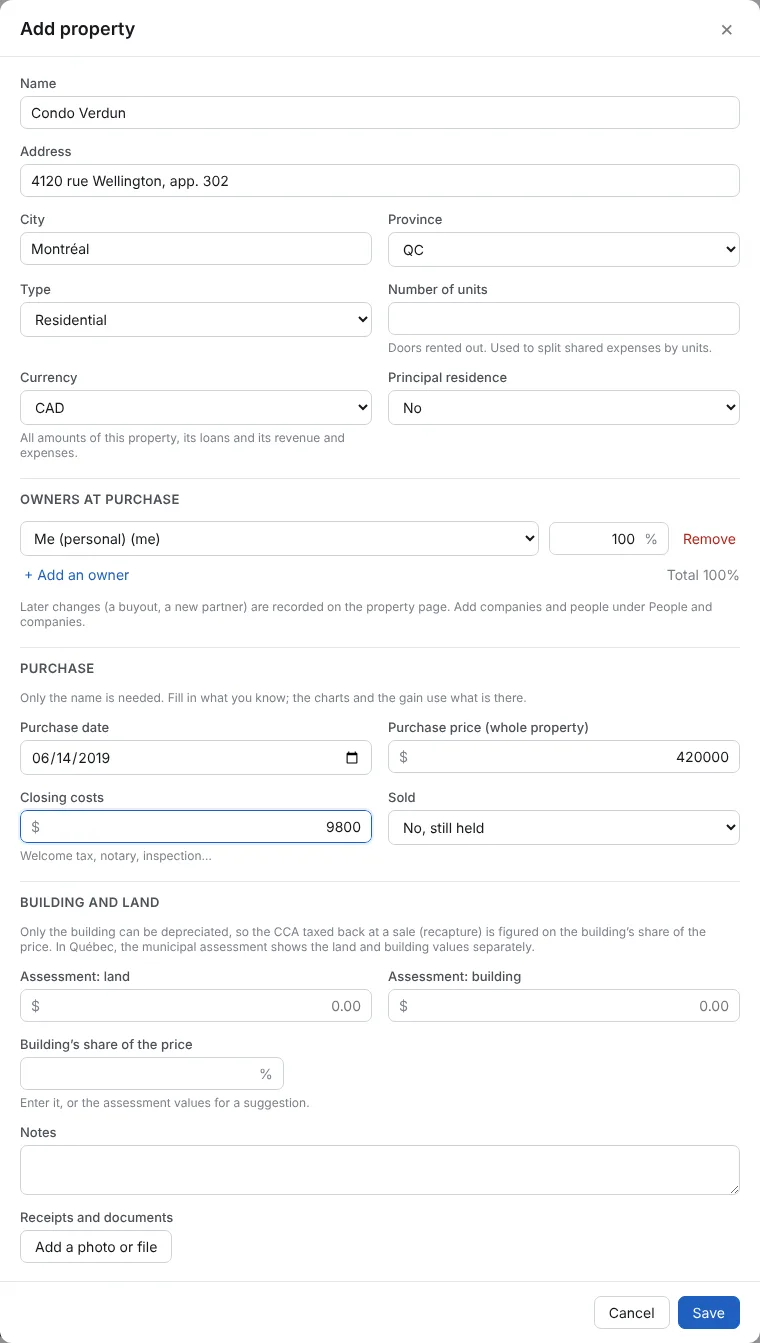
Step 1: Add property with the purchase
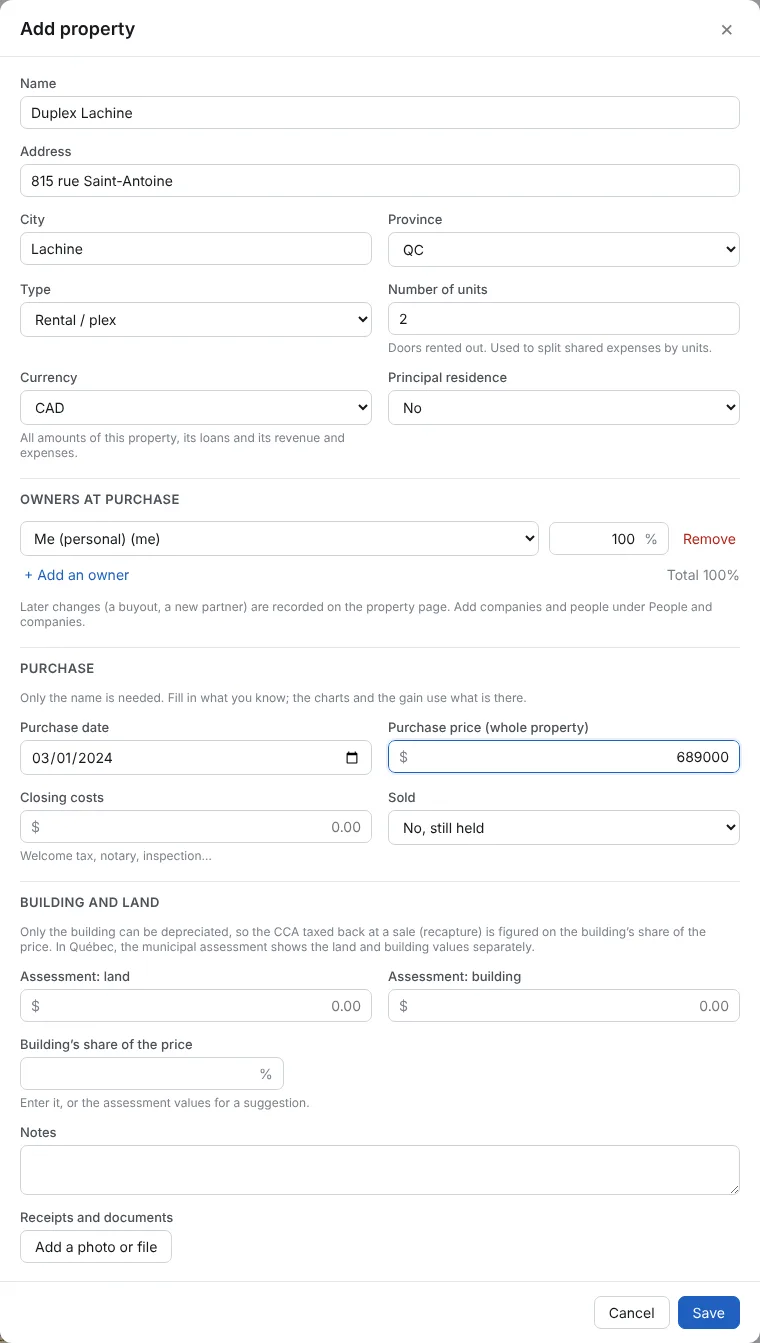
In Real estate, click Add property. Fill the Name, Address and City, the Purchase date, the Purchase price (whole property) and the Closing costs (welcome tax, notary, inspection, as one total).
If you own it with someone, set the shares under Owners at purchase. Click Save.
Step 2: Add the mortgage
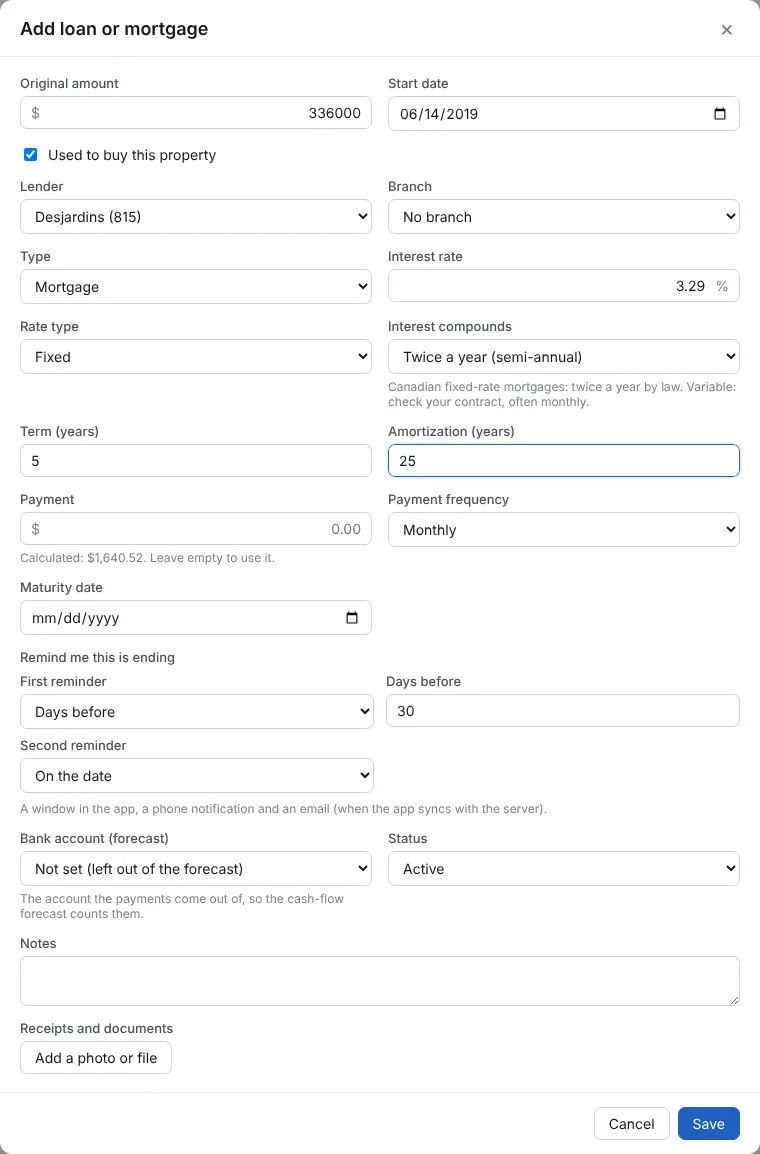
Open Value and loans, then the Loans and mortgages tab and click Add loan. Fill the Original amount and the Start date (the deed date), check Used to buy this property, then the Lender, Interest rate, Rate type, Term and Amortization. Under Payment, type the payment from your mortgage papers, or leave it empty to use the one the app calculates.
Optional: Bank account (forecast) puts the payments in the cash-flow forecast, and the reminder warns you before the term ends. Click Save.
Step 3: Check the loan
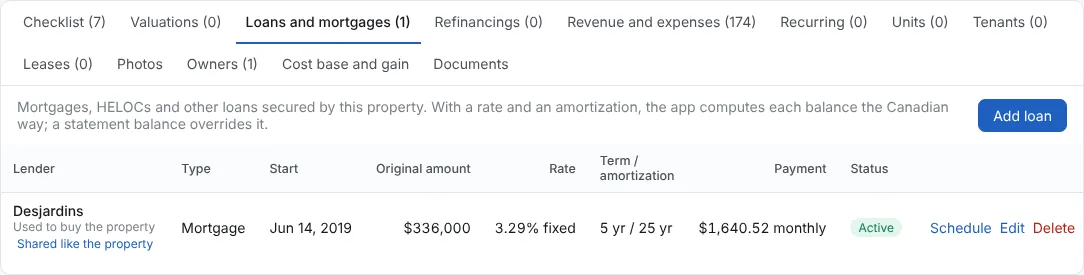
The loan is listed with its terms. Schedule shows every payment split into interest and principal. The payments also appear under Revenue and expenses by themselves; you do not type them.
Step 4: Add today’s value, leave Owed empty
On Valuations, click Add valuation and type the Market value. Leave Total owed empty: the app uses the loan’s computed balance.
Step 5: Done: the whole history since the purchase
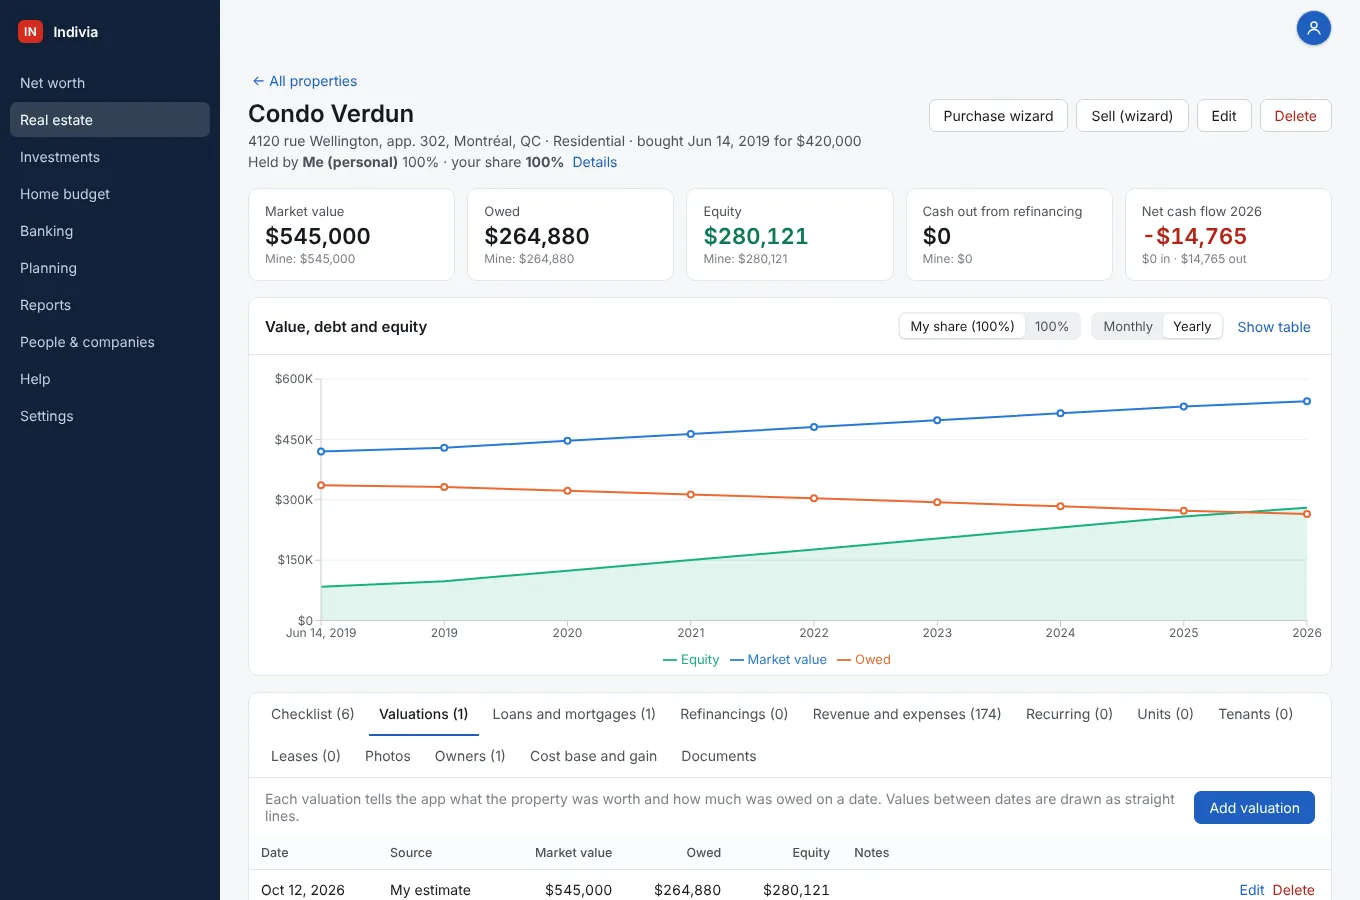
The chart starts at the purchase. The orange line is the mortgage going down; the green area is your equity going up. Above the chart, switch between Monthly and Yearly, and between My share and 100%.
Management
For a landlord who mostly wants to run the building: who lives where, what rent is due, what came in and what was spent. Have the leases and the tax and insurance bills handy.
Step 1: Add property as a rental
In Real estate, click Add property. Fill the Name and address, set Type to Rental / plex, the Number of units, and the Purchase date and Purchase price for the basic numbers. Click Save.
Step 2: Add one lease per unit
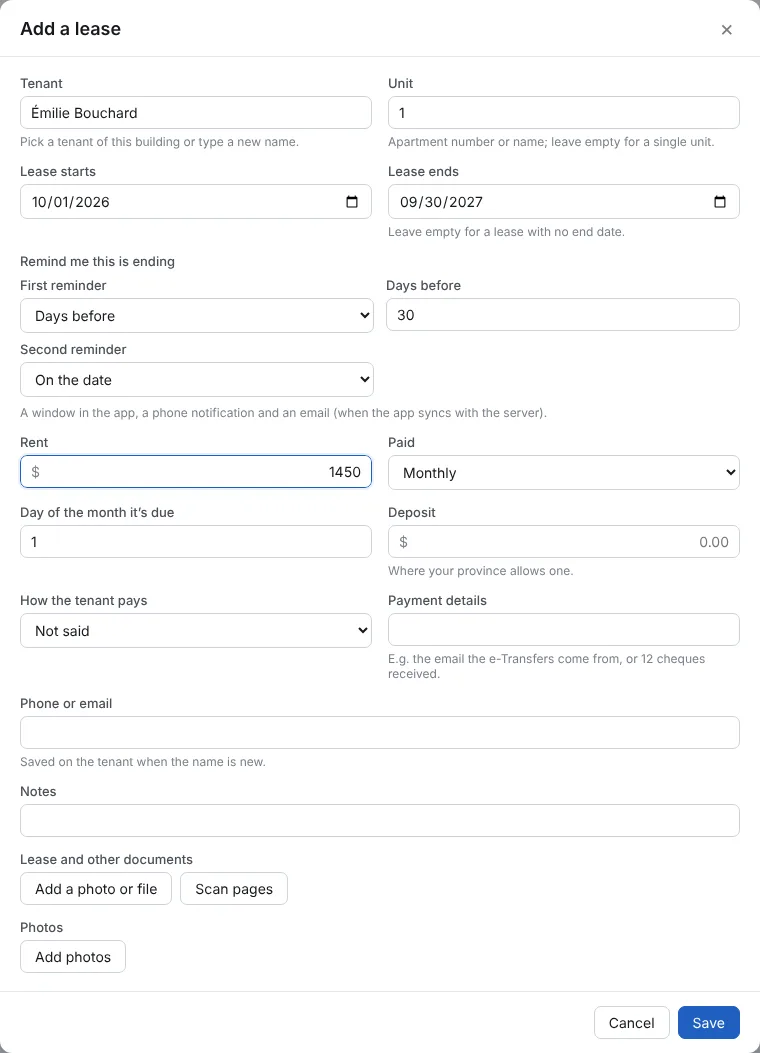
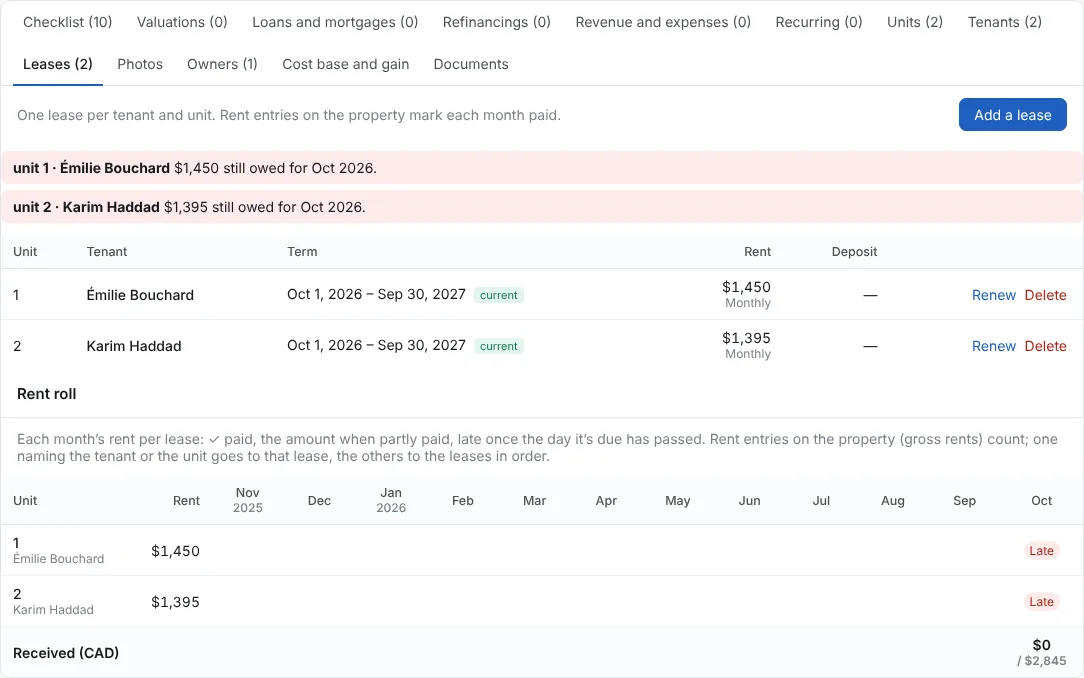
Open Rentals, then the Leases tab and click Add a lease. Type the Tenant name and the Unit (“1”, “2”, “Upstairs”…), the start and end dates, the Rent and the day it is due. You can attach the signed lease or scan its pages. Click Save, then do the same for each unit.
You do not need to create the units and tenants first: a lease with a new unit name and a new tenant name makes both for you.
Step 3: Leases, units and tenants are filled
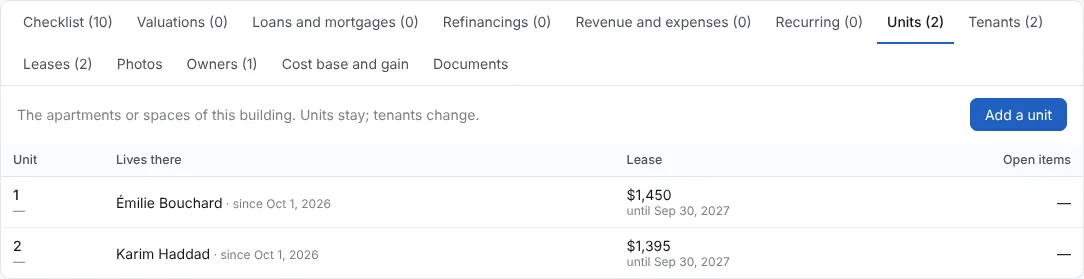
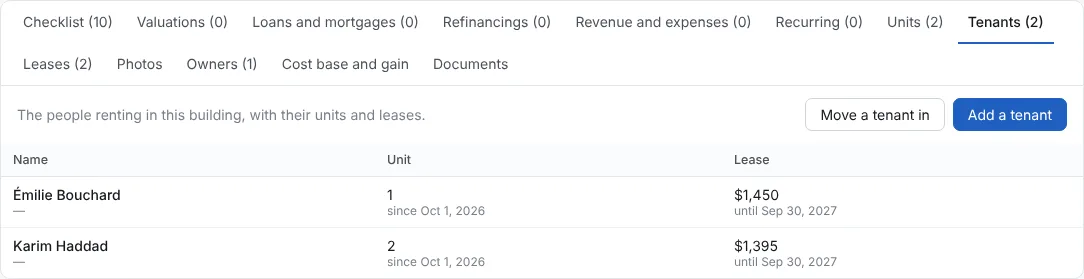
The Leases tab lists the leases; the current month shows Late until the rent is recorded (step 5). Units shows who lives in each one, and Tenants has their contact details. Click a unit to add its size, photos, a repair log or a rental ad.
Step 4: Add the rent as a recurring entry
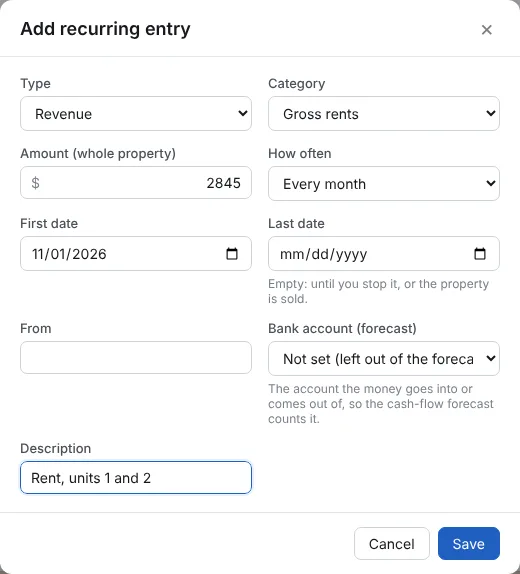
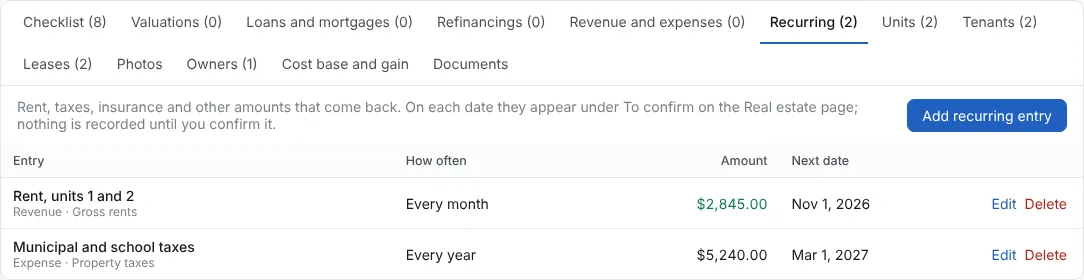
Open Money, then Recurring, and click Add recurring entry. Choose Revenue, the category Gross rents, the monthly total, Every month and the first date. Each month the rent shows under To confirm on the Real estate page, and one click records it.
Do the same for bills that come back, like the municipal and school taxes once a year (Expense, Property taxes, Every year).
Step 5: Record what came in and went out
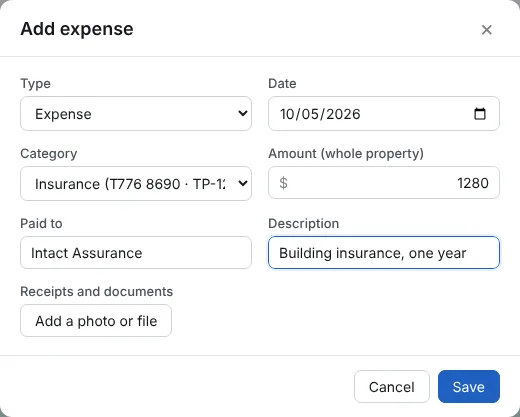
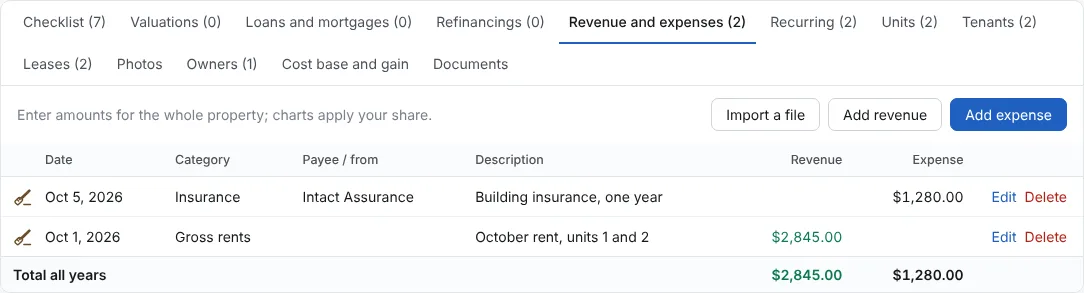
On Revenue and expenses, use Add revenue for a rent received and Add expense for a bill. Each category carries its T776 and TP-128 line for tax time. Import a file takes a bank file instead of typing.
Step 6: Follow the rent on the rent roll
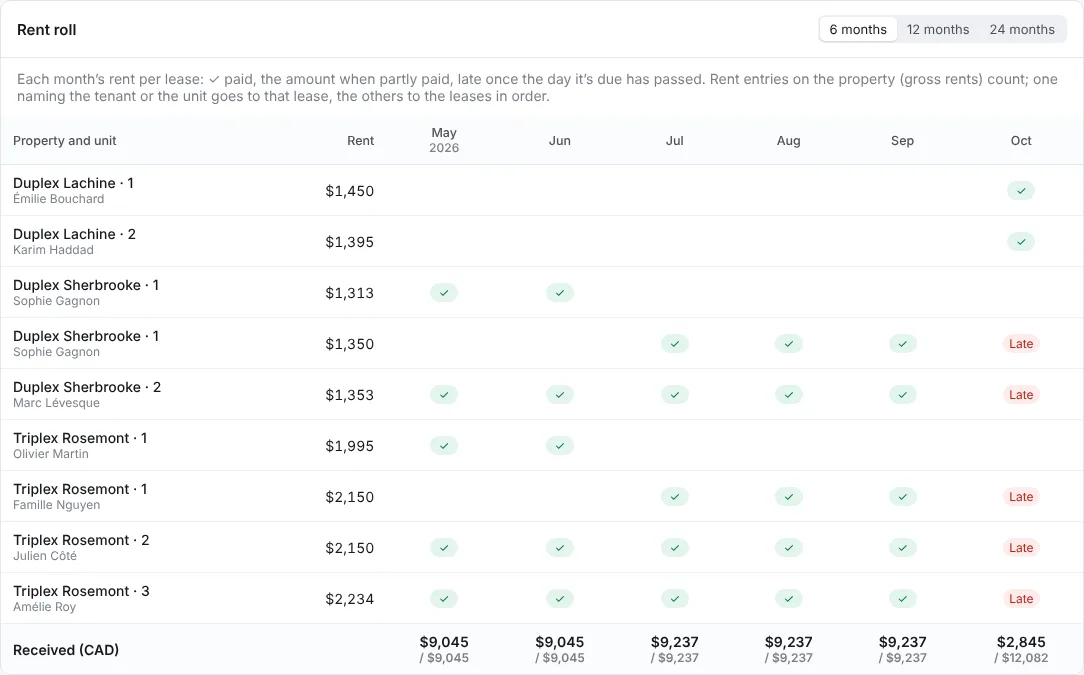
In Real estate, the Rent roll tab shows each lease month by month: ✓ paid, the amount when partly paid, and Late once the due day has passed. The reminders above it list late rent, lease ends and the notice dates for a rent increase.
Everything
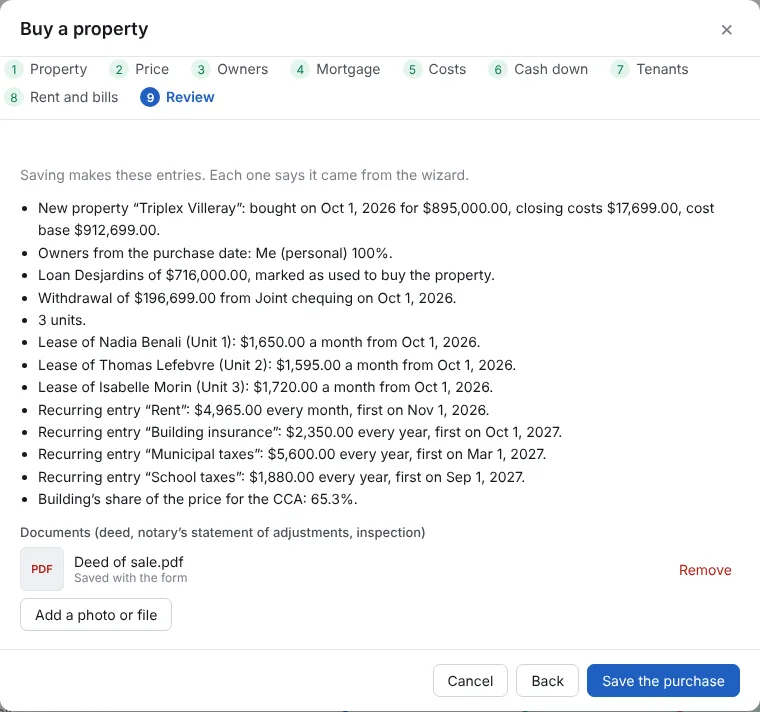
For someone who wants everything. The wizard asks the purchase in nine steps and makes every entry: the property, its owners, the mortgage, the welcome tax and other costs, the cash down from your accounts, the leases taken over, the rent, insurance and taxes that come back, the building’s share for the CCA and the documents. Have the notary’s statement of adjustments, the mortgage papers, the leases and the municipal assessment handy.
Step 1: Start the wizard: the property
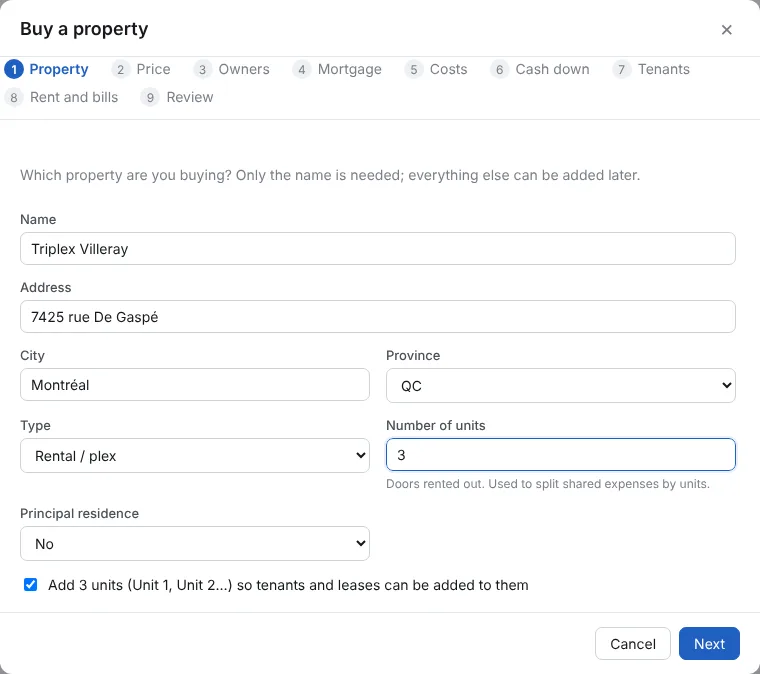
In Real estate, click Buy a property (wizard). Type the name, address and city, the Type and the Number of units. Keep Add … units checked so the units exist for the leases. Click Next.
Step 2: The price, the assessment and the building’s share
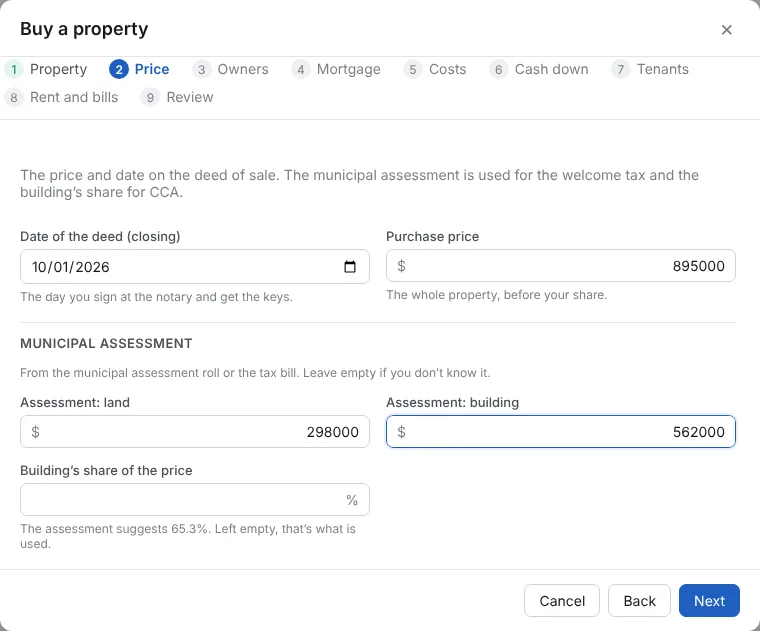
Type the Date of the deed, the Purchase price, and the municipal assessment for Land and Building. The assessment is used for the welcome tax and suggests the Building’s share of the price for the CCA: leave that field empty to use the suggestion, or type your accountant’s figure.
Step 3: The owners
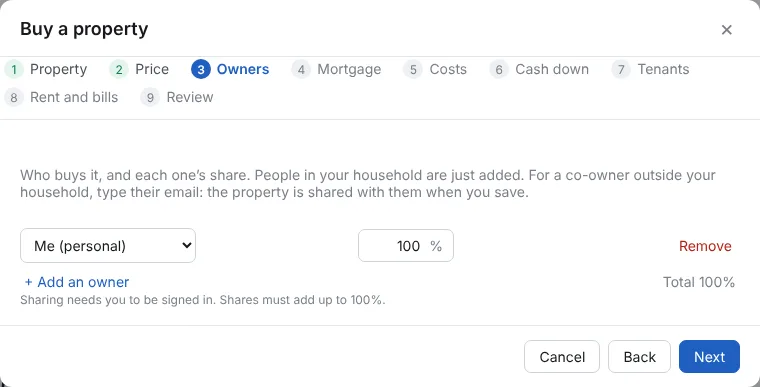
You at 100% by default. Add an owner for a spouse, a partner or a company, with their share. Someone outside your household with an email gets an invitation to accept their share.
Step 4: The mortgage
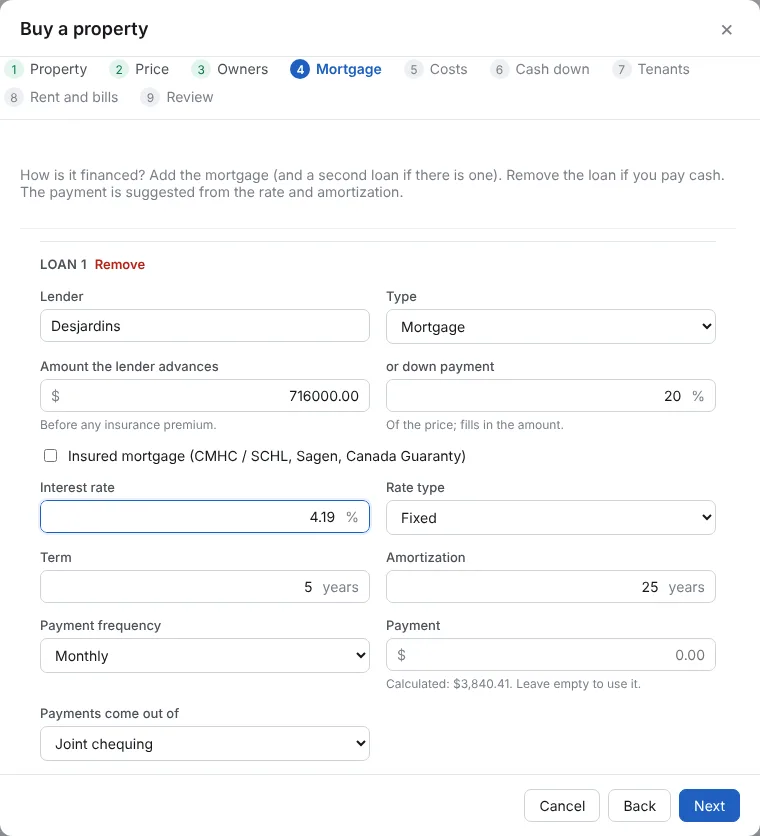
Type the Lender and either the amount or the down payment percentage. Check Insured mortgage if CMHC, Sagen or Canada Guaranty insures it: the premium and its provincial tax are added. Type the rate, term and amortization. Under Payment, the app shows its calculation: leave it empty to use it, or type the payment from your papers. Pick the account the payments come out of.
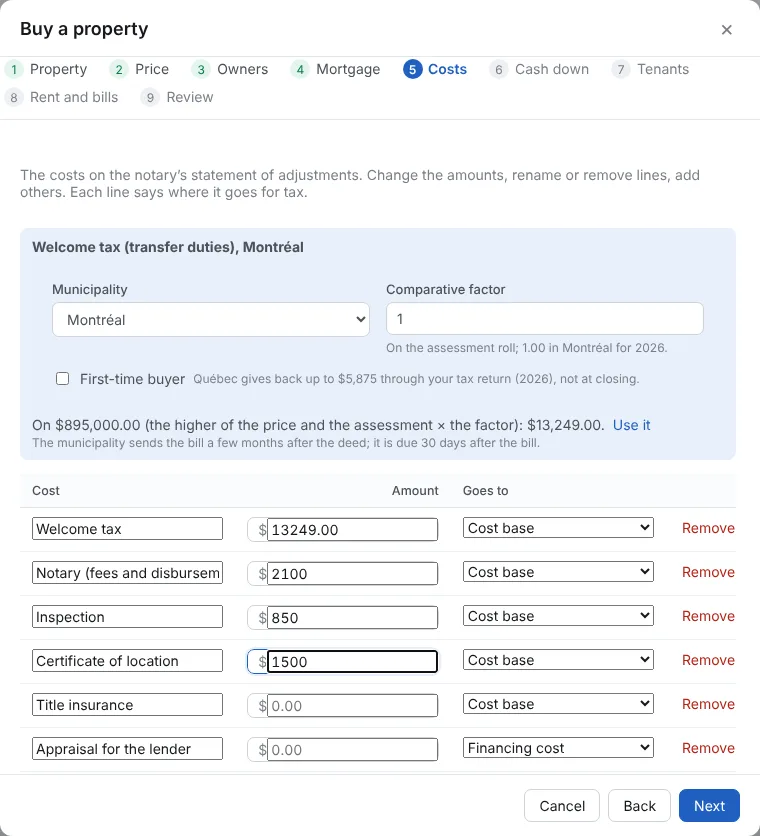
Step 5: The costs
The welcome tax is worked out for the municipality. Type the notary, inspection and certificate of location from the statement of adjustments. Each line says where it goes for tax: the cost base, a financing cost spread over five years, or an expense.
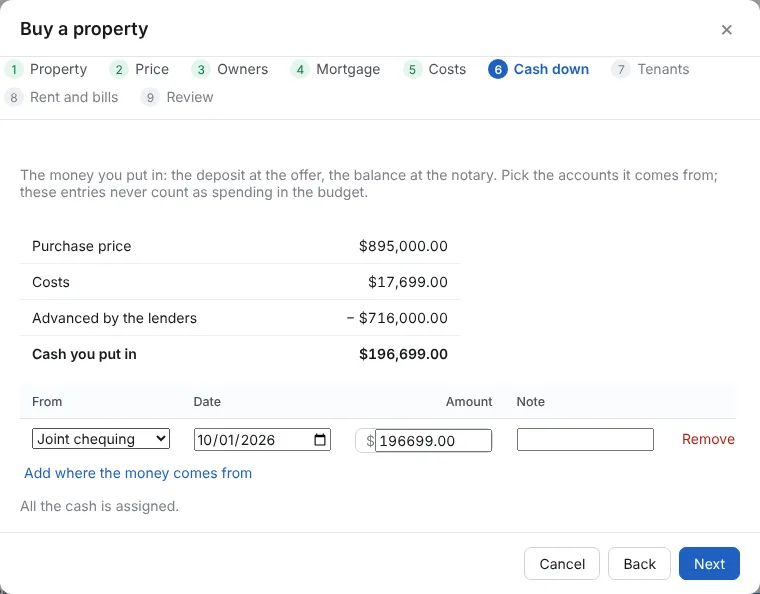
Step 6: The cash down
The wizard shows the cash you put in (price plus costs minus the loans). Click Add where the money comes from and pick each account: the deposit with the offer, an FHSA, chequing. These withdrawals never count as spending in the budget.
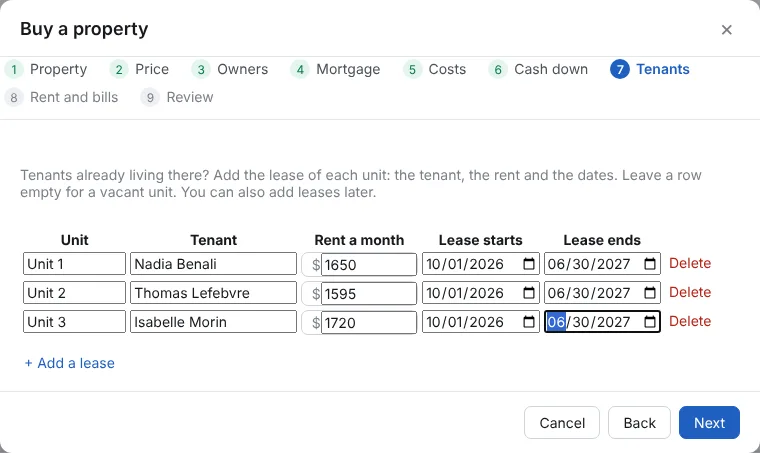
Step 7: The tenants already there
A rental shows a row per unit. Type each Tenant, the Rent a month and the lease dates from the leases the seller handed over. Leave a row empty for a vacant unit; Add a lease adds one more. The tenants are made with the leases.
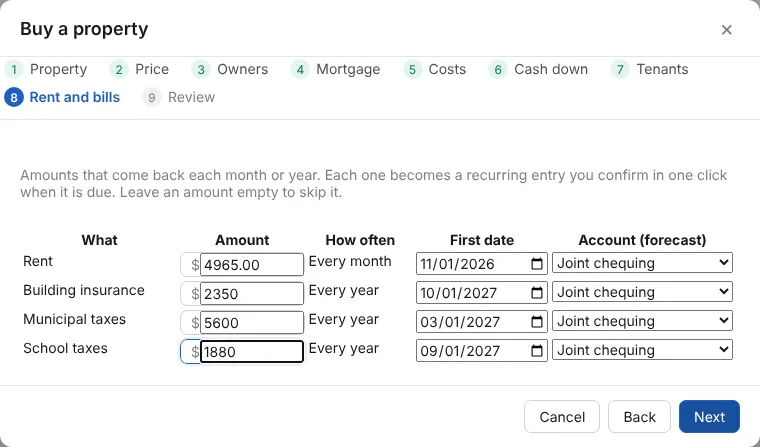
Step 8: The rent and the bills
The rent is the total of the leases. Type the yearly Building insurance, Municipal taxes and, in Québec, School taxes, check the First date of each and pick the account they go through. Each one becomes a recurring entry; leave an amount empty to skip it.
Step 9: Add the documents, review and save
The last step lists every entry the wizard will make. Under Documents, click Add a photo or file for the deed, the notary’s statement and the inspection report. Click Save the purchase. Each entry says it came from the wizard, and Purchase wizard on the property page reopens it to fix anything.
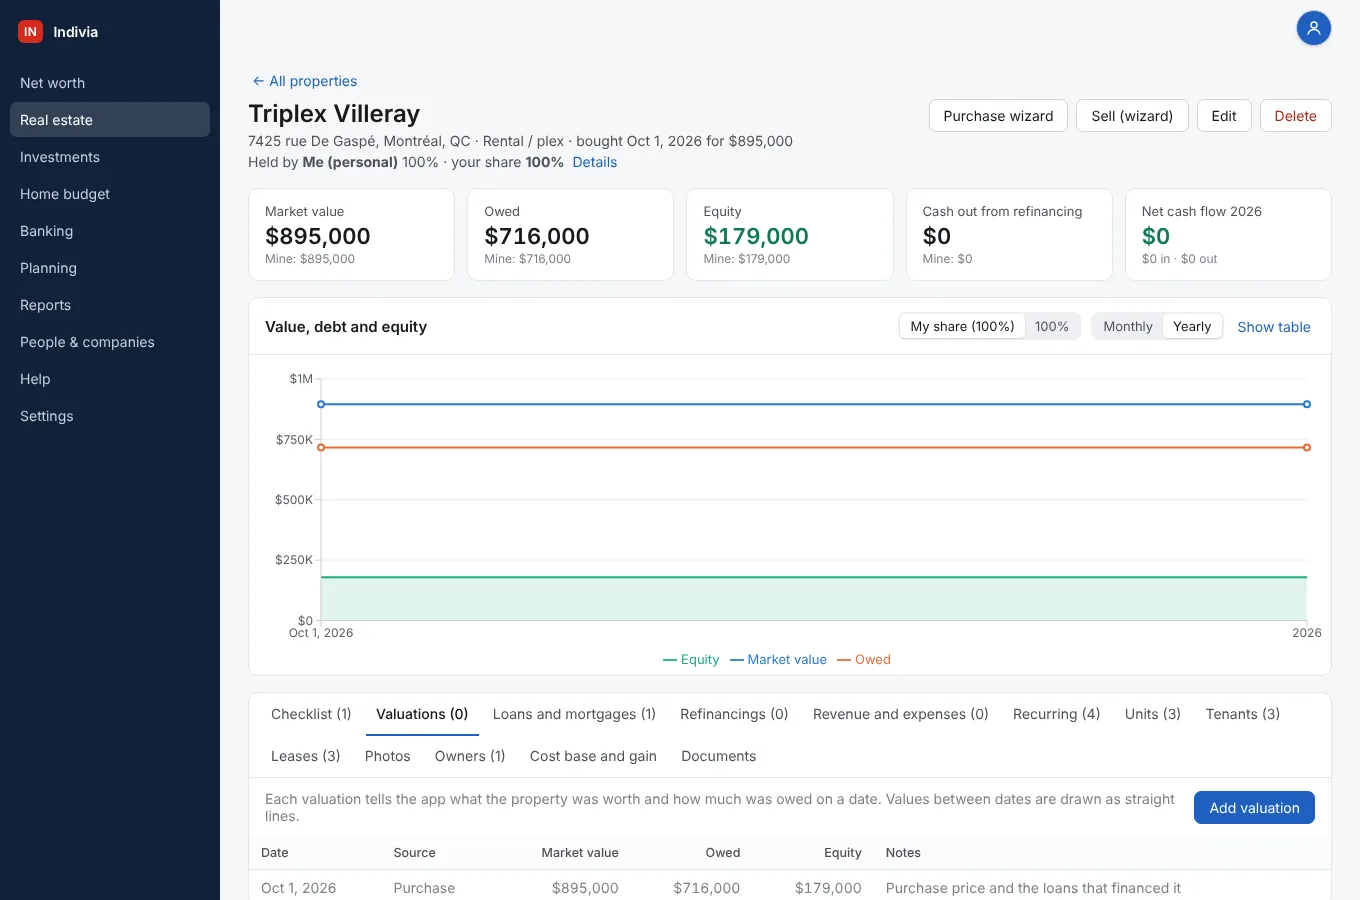
Step 10: See what the wizard made
The Leases tab has a lease per tenant, Recurring has the rent, the insurance and the taxes, and Documents has the files you added.
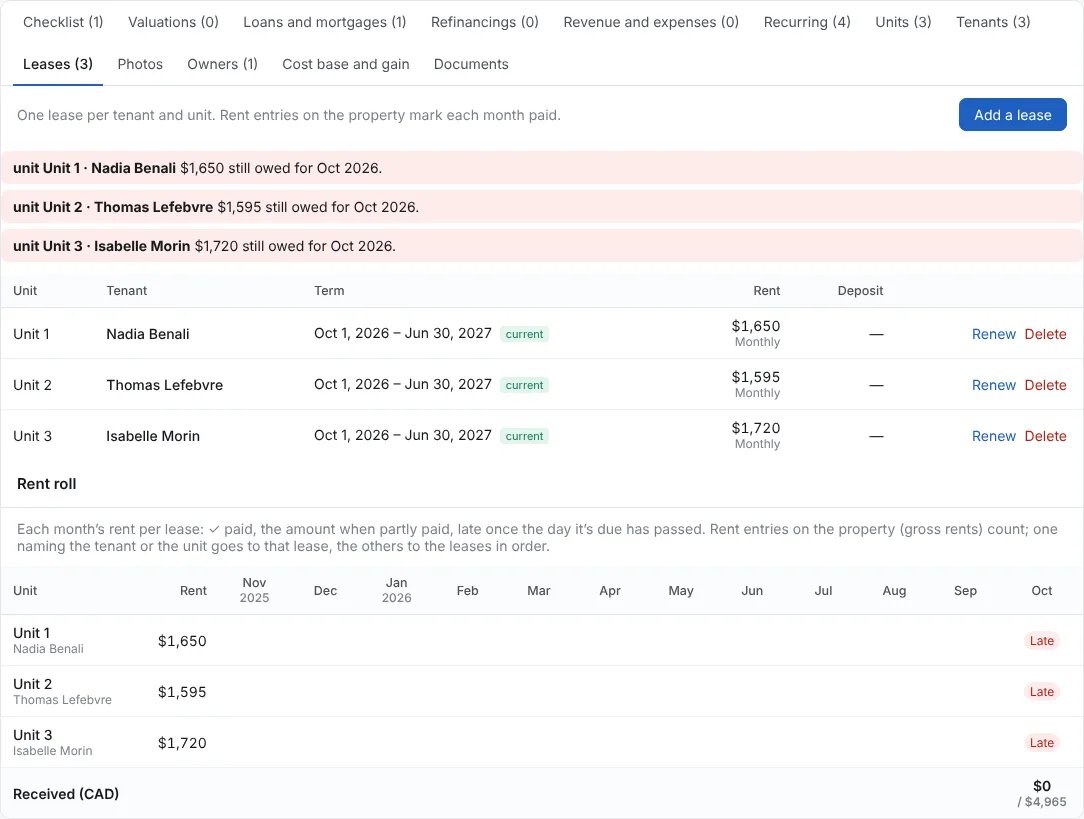
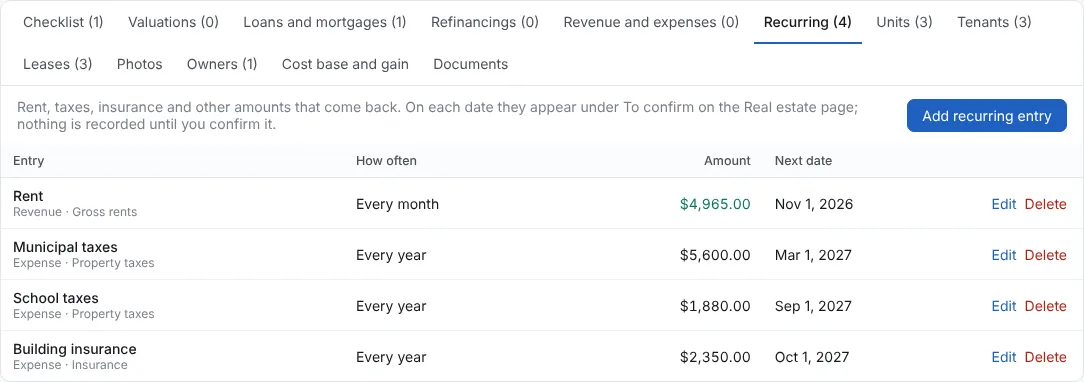

Step 11: Finish with the Checklist tab
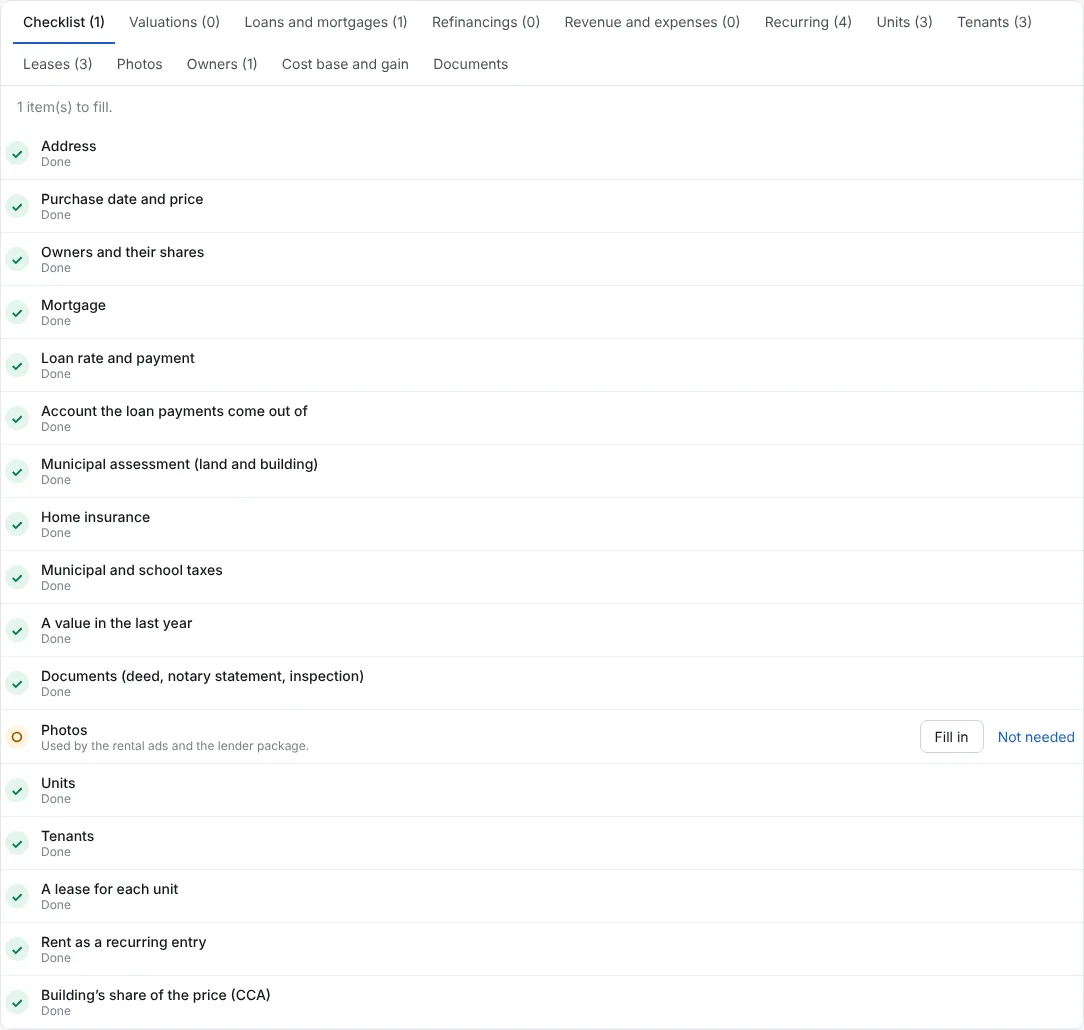
It shows what the wizard filled (green) and what is left (orange), usually only the photos. Fill in opens the right tab; Not needed takes an item off the list.
Still a question? Write to support@indivia.app. Your message goes straight to the people who make the app.