Your data is kept on your device. With a plan that syncs, it is also kept, locked, on Indivia’s server and on your other devices (Settings, Account and security).
In the installed app on a computer, Settings, Backup copies all your data to a folder you pick (OneDrive, Dropbox, an external drive) once a day. To go back to a backup, pick it and use Restore: your current data is saved first.
Backups are locked with your household’s data key, which only your devices and your printed recovery key have. Print the recovery key (Backup, Show the recovery key) and keep it safe: it opens a backup when you have none of your devices.
The browser version can’t write backup files; use the installed app for backups.
Names in bold are the pages, tabs and buttons as the app shows them.
Step-by-step tutorials
Pick a way. The screens are shown with sample data.
- Keep your recovery keyPrint the key that opens your backups if you can no longer sign in. Two minutes, once.
- Back up to a folderA copy of all your data, every day, in OneDrive, Dropbox or on an external drive.
- Restore a backupGo back to how your data was on an earlier day. You can undo it for 7 days.
- Add a new phone or computerSign in on the new device: your data comes from your account and stays in sync.
Keep your recovery key
Your backups are locked with your household’s data key, which only your devices have. Any of your devices opens them by itself. If you lose all your devices, the printed recovery key is the only way to open them. This needs the installed app on a computer, signed in to your account.
Step 1: Open Settings, Backup
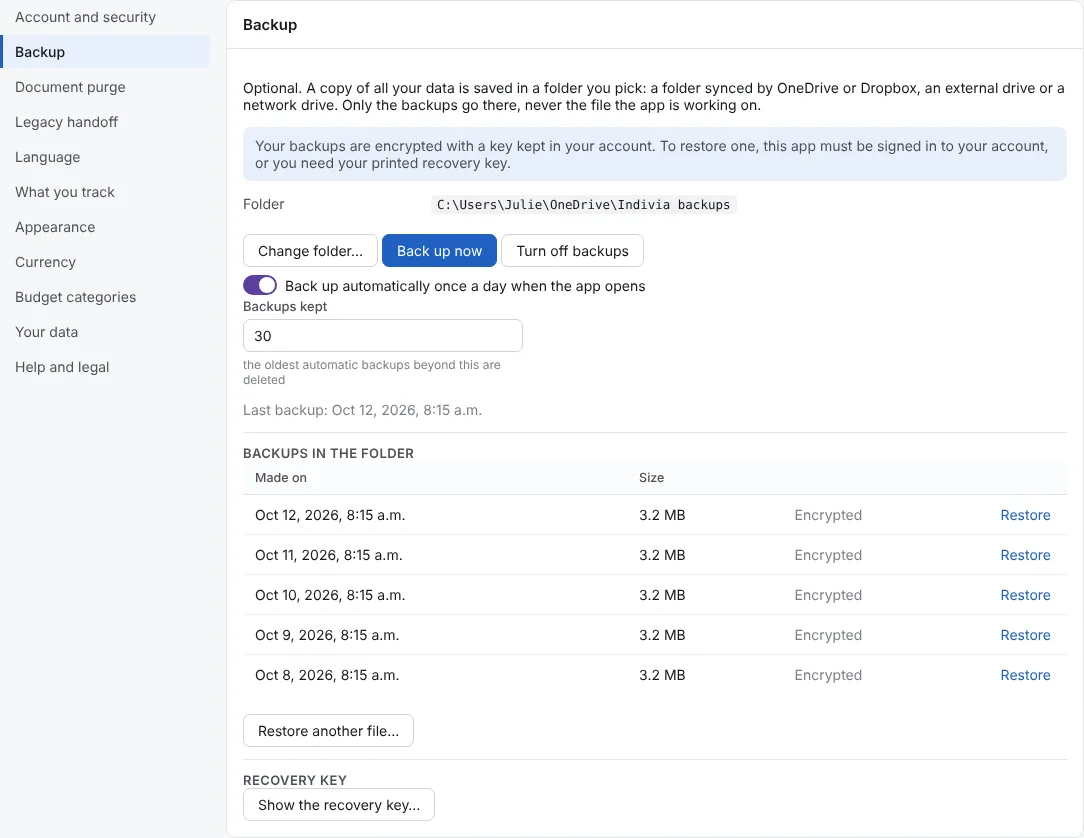
In the menu on the left, click Settings, then Backup. The blue box says your backups are encrypted with your household’s data key. At the bottom, under Recovery key, click Show the recovery key….
Step 2: Print the key
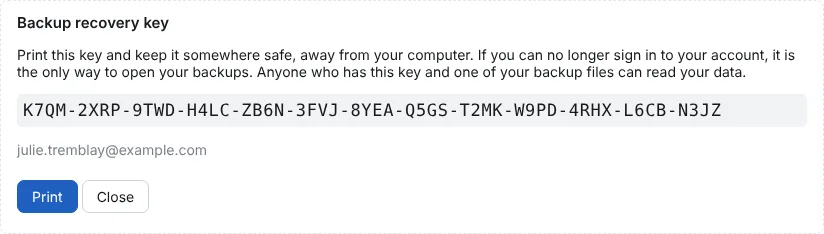
The Backup recovery key shows: 13 groups of 4 letters and digits, with the email of the account it belongs to. Click Print: only this sheet is printed, not the rest of the page. Then click Close.
Step 3: Keep the sheet somewhere safe
Keep the paper away from your computer, for example with your will or in a safe. Anyone who has this key and one of your backup files can read your data, so don’t email it or save it in the backup folder.
Back up to a folder
Your data is on your device and, when you are signed in, on the server. A backup folder adds your own copy, which you control. It needs the installed app on a computer: the browser version and the phone app can’t write backup files.
Step 1: Open Settings, Backup
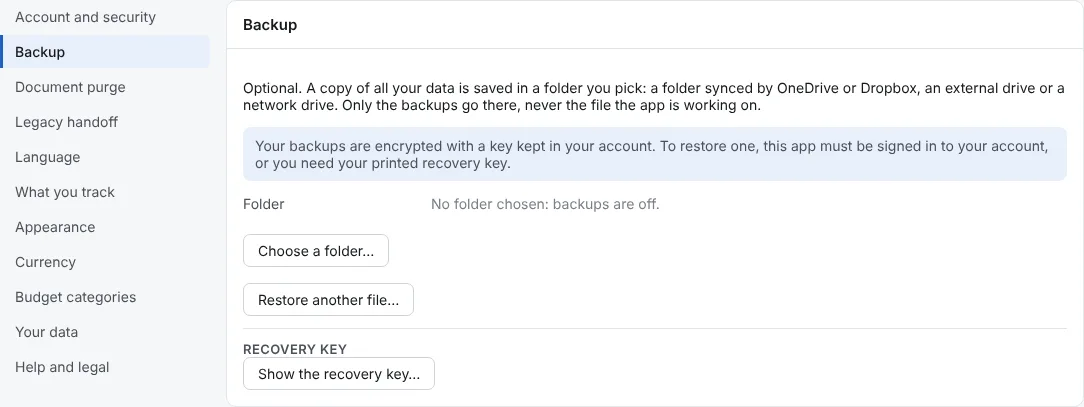
Click Settings, then Backup. Folder says “No folder chosen: backups are off.” Click Choose a folder….
Step 2: Pick the folder
Your computer’s folder window opens. Pick a folder that is copied somewhere else: one inside OneDrive or Dropbox, an external drive or a network drive. Making a new folder named “Indivia backups” keeps things tidy. Click Select Folder (Windows) or Open (Mac).
Step 3: Back up now, then every day by itself
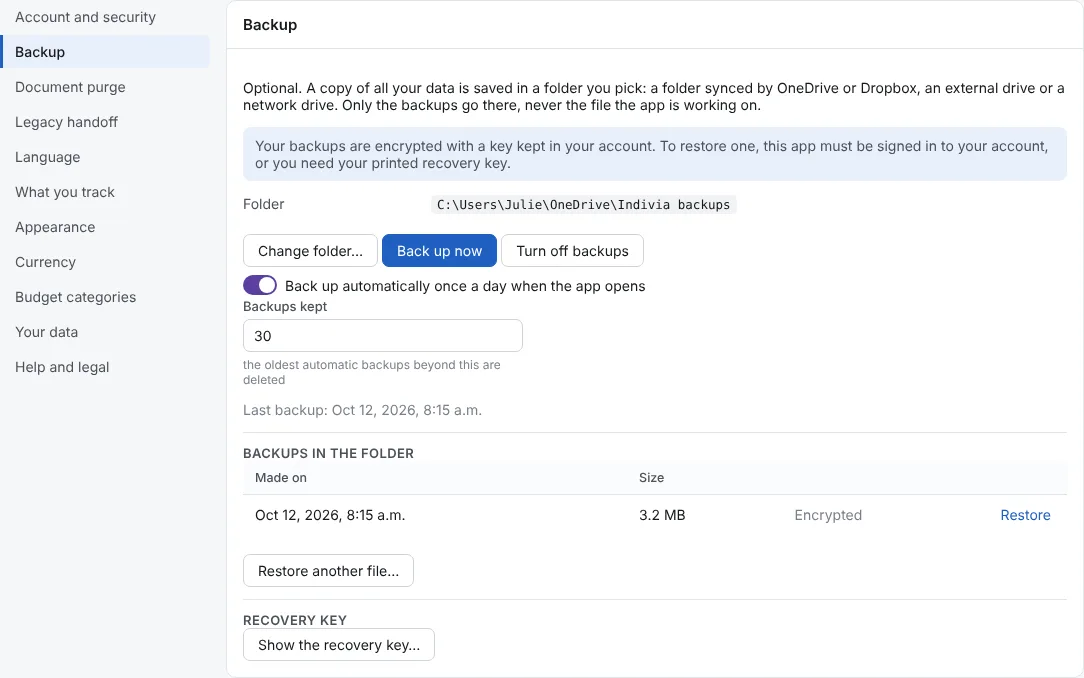
Click Back up now for the first copy. It shows under Backups in the folder, marked Encrypted.
Leave Back up automatically once a day when the app opens on. Backups kept is 30: the oldest automatic backups beyond that are deleted. Last backup tells you when the last one was made.
Restore a backup
Restoring replaces all your data with the backup, on every device signed in to your account. Before it does, the app keeps a copy of your current data, so a restore can be undone for 7 days.
Step 1: Pick the backup
In Settings, Backup, the list Backups in the folder shows each backup by the date it was Made on, newest first. Click Restore on the one you want.
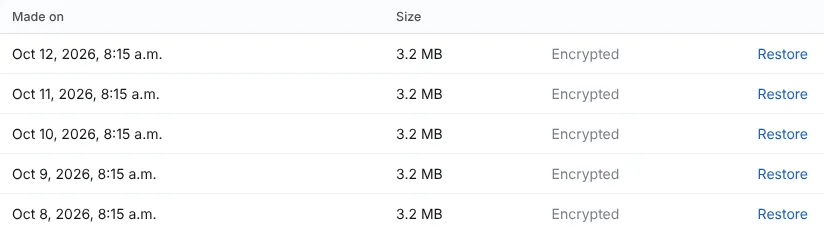
Step 2: Confirm
The app asks: “Replace all your data with the backup of …?” and reminds you that, signed in, the restored data becomes the data on all your devices. Click OK. The app restarts on the restored data.
Step 3: Changed your mind? Undo within 7 days
Back in Settings, Backup, a yellow box says which backup you restored and until when you can undo it. Undo the restore puts your data back as it was just before the restore. Anything entered since the restore is replaced.
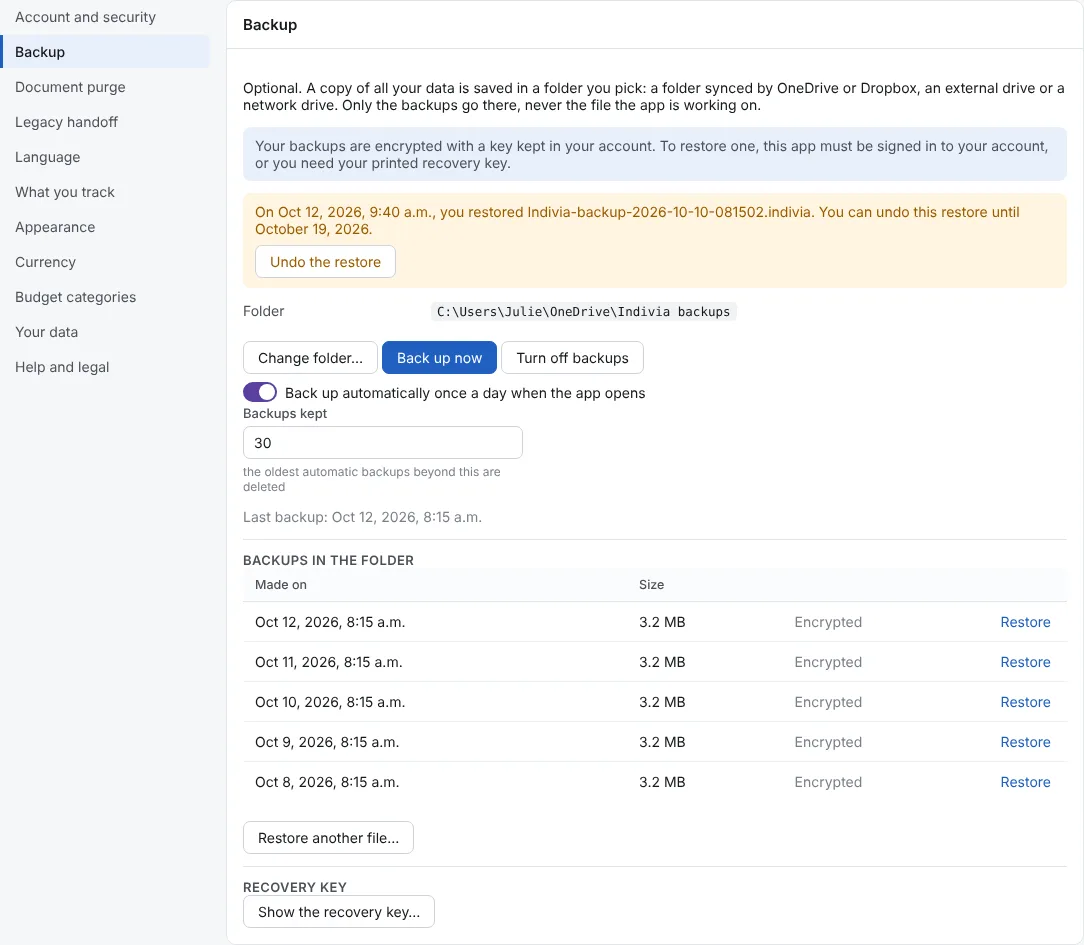
Step 4: A backup from somewhere else
For a file outside the folder (an old drive, a copy someone gave you), click Restore another file… and pick it.
If the backup was made under an account this app isn’t signed in to, the app asks for its Recovery key: type the printed key (the dashes are optional) and click Restore with this key.

Add a new phone or computer
Every device signed in to your account has the same data and sends its changes to the others. You need your email, your password and your phone with the authenticator app (or a recovery code). There is nothing to approve on the old device: the account emails you about the new sign-in instead.
Step 1: Install Indivia on the new device
Install the app the same way as on your first device, and open it. It opens on the sign-in screen.
Step 2: Sign in
Type your Email and Password.
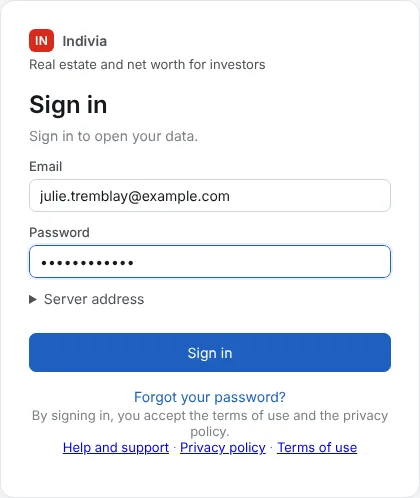
Step 3: Name the device
Click Server address to see two more fields. Leave the Server address as it is, unless your invitation email gave another one. Change Name of this device to something you will recognize, like “Julie’s iPhone”. Click Sign in.
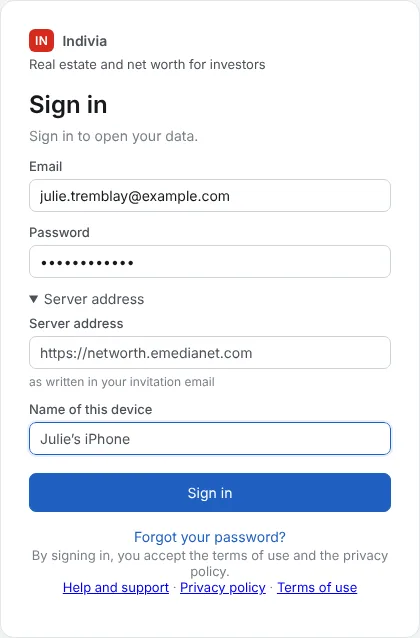
Step 4: Type the code from your phone
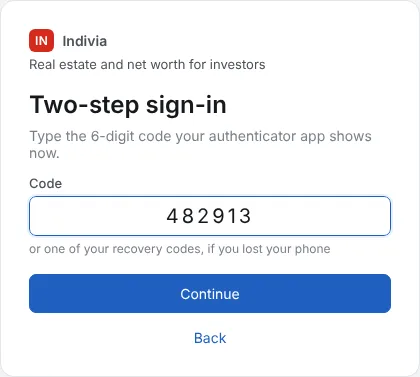
Open your authenticator app and type the 6-digit Code it shows now. Lost that phone? Type one of your recovery codes instead. Click Continue.
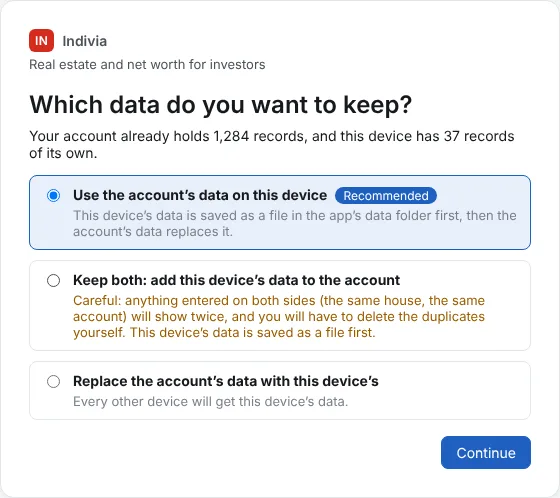
Step 5: Only if the device already has data: choose
A brand-new device has nothing yet, so it simply takes your account’s data and this screen doesn’t show. If you entered things on it before signing in, the app asks which data to keep. Keep the Recommended choice, Use the account’s data on this device, unless you are sure. Click Continue.
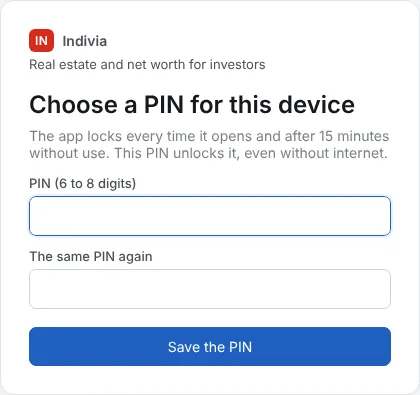
Step 6: Choose a PIN for this device
Type a PIN of 6 to 8 digits twice and click Save the PIN. It unlocks the app on this device, even without internet. Each device has its own PIN.
If you answered the setup questions on another device, the app then asks once: Do you want to keep the same language and display preferences as your last installation? Click Yes, keep them to take your language, appearance and warnings from your last device, or No, ask me to answer those few questions again.
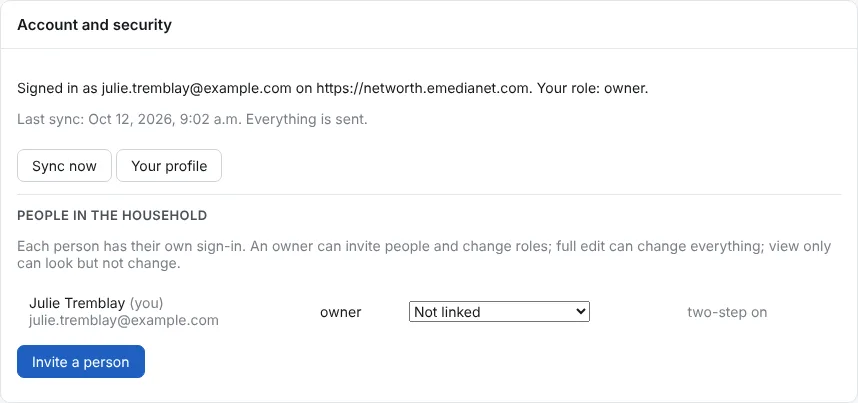
Step 7: Check that it syncs
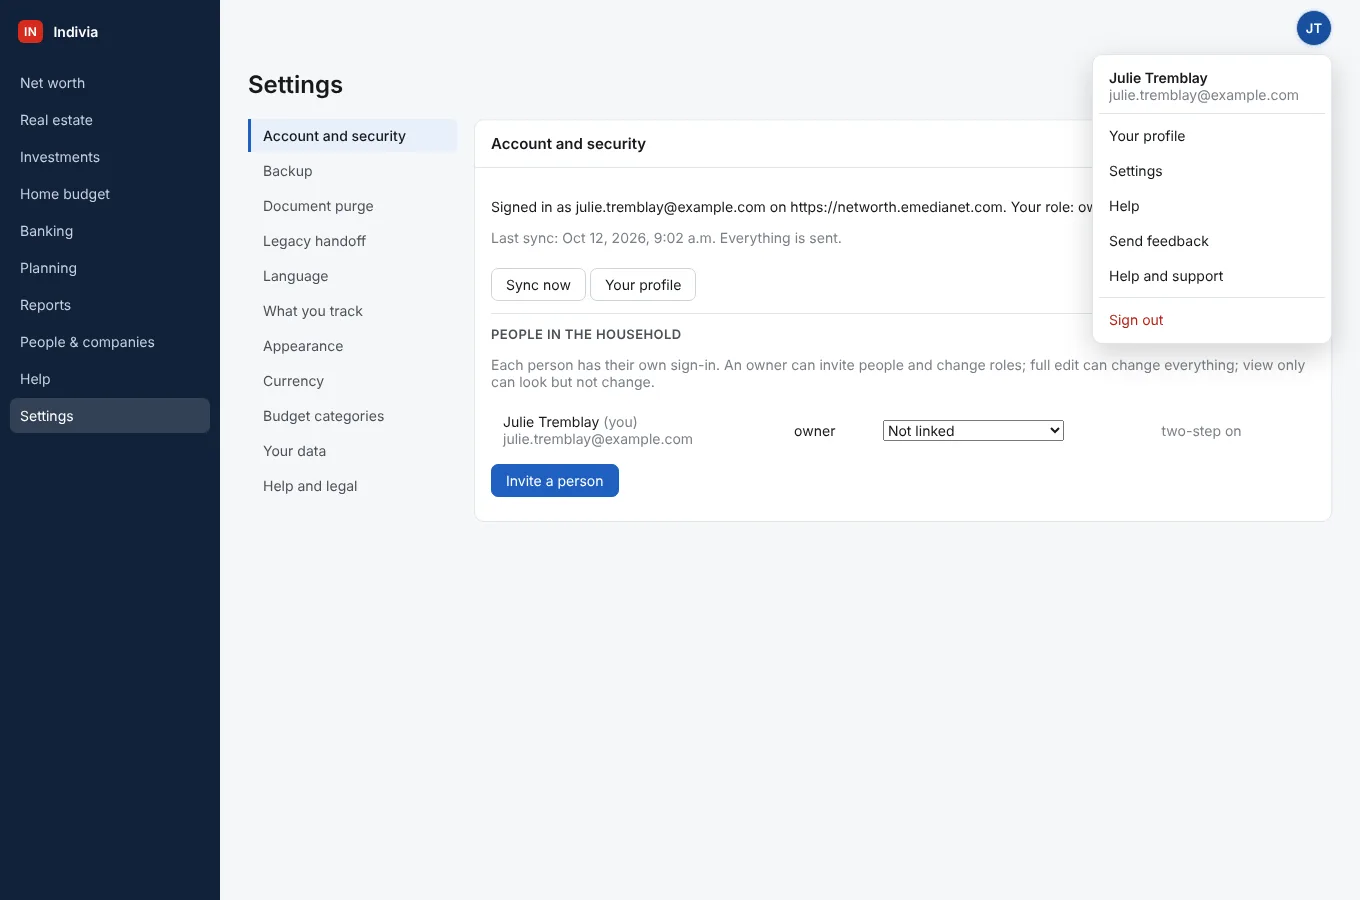
Open Settings, Account and security. It says who is signed in, the Last sync and “Everything is sent.” Sync now sends and receives right away; otherwise the app syncs by itself every few minutes.
Step 8: See all your devices
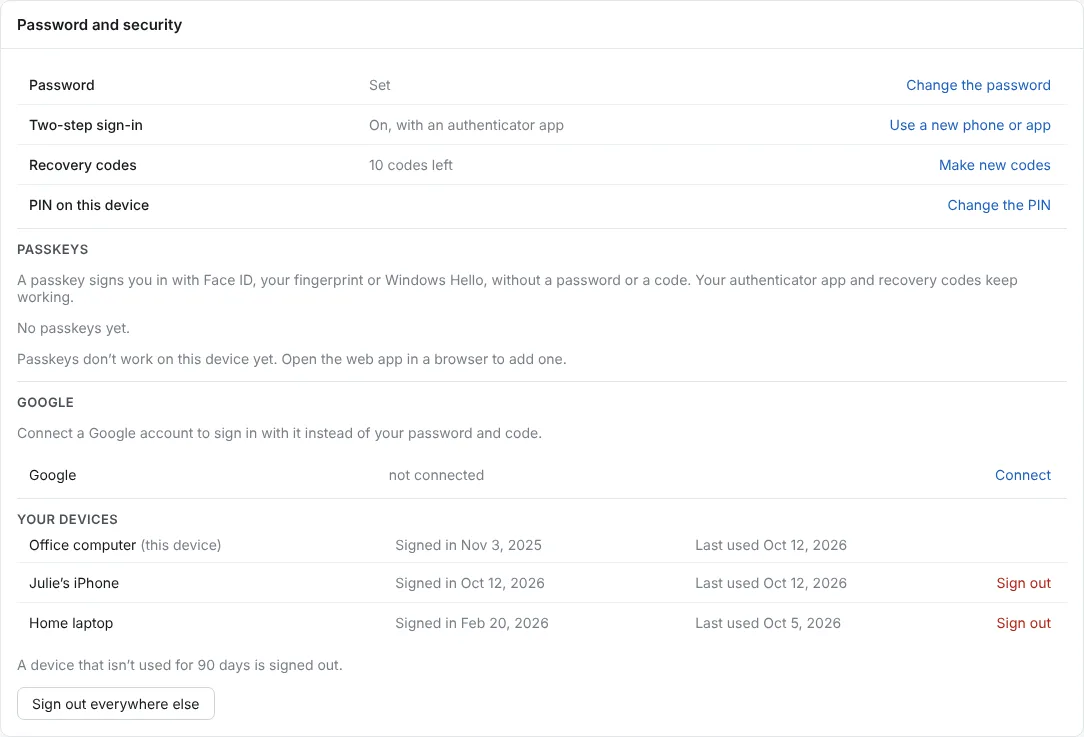
Click your initials at the top right, then Your profile. Under Password and security, Your devices lists every device signed in, with when it signed in and was last used. Click Sign out next to a device you lost or no longer use, or Sign out everywhere else.
Still a question? Write to support@indivia.app. Your message goes straight to the people who make the app.